Sunday, November 6, 2011

Recycled Pringles Can

This week at MOPS our guest speaker spoke on budgeting. We also talked about the importance of teaching our kids how to save, give and spend appropriately. The craft we did was to make your own piggy bank. Since we operate on a budget at MOPS I try to keep the crafts to $1 per mom. Kroger was running a sale on Pringles so I stocked up on 50 cans. This was an interesting sight! I emptied each can and put the chips in Ziploc bags for the moms to take home, then washed out the cans. We used scrapbook paper and Mod Podge (love the stuff!) to cover the cans. We embellished with stickers and ribbon and cut a slit in the lid for the change. I decorated my bank with Disney stickers since we're saving for our Disney trip in February. Another idea for the Pringles can is to fill it with cookies and give at Christmas.

Chicken Wire Art Frames

I came across this idea on Pinterest and thought it was so cute! Every day the kids come home with art work and I don't have a place to display it all. I've made the mistake of throwing away some of my daughter's work only to have her dig it out of the garbage and ask me with such a sad face why I threw it away. Well here's the solution to my problem. Plus I love to find old treasures at yard sales and Goodwill so it was the perfect project for me. I gathered a bunch of frames in various shapes and sizes and removed the glass and picture. Then I spray painted them all the same color. Since they are going in the kids playroom I chose orange.
I then cut chicken wire to fit each frame and stapled it to the back. Since I wasn't sure if the wire would scratch the walls I covered it with duct tape.
Here's the finished product. It was an easy weekend project. The kids are so excited to have their artwork on display. The lamp in the picture was a fun art project I did with the kids. We took a plain lampshade and hot glued buttons on it. You can't see the from this picture but the playroom has polka dots on the walls so it went perfect with our theme.


Sunday, October 23, 2011

Frame from an old window

I found this old window at an antique store and painted it black. I didn't even sand it because I wanted the rugged look. I have terrible handwriting so I found a font I liked and printed off the "G" on the computer. Holding it behind the glass I traced it using a black paint pen. I'm still trying to decide if I want to put black and white pictures in the panes or some fun fabric. Any thoughts?

Hand Sanitizer

Everyone uses hand sanitizer but it's not always pretty. This is another simple craft we did at our last MOPS meeting. All you do is peel the label off a $1 bottle of hand sanitizer and replace it with stickers. Embellish with ribbon and buttons. It would make a great teacher gift. You can even monogram it with a paint pen. Simple, inexpensive and fun!

Bathroom Storage Cubby

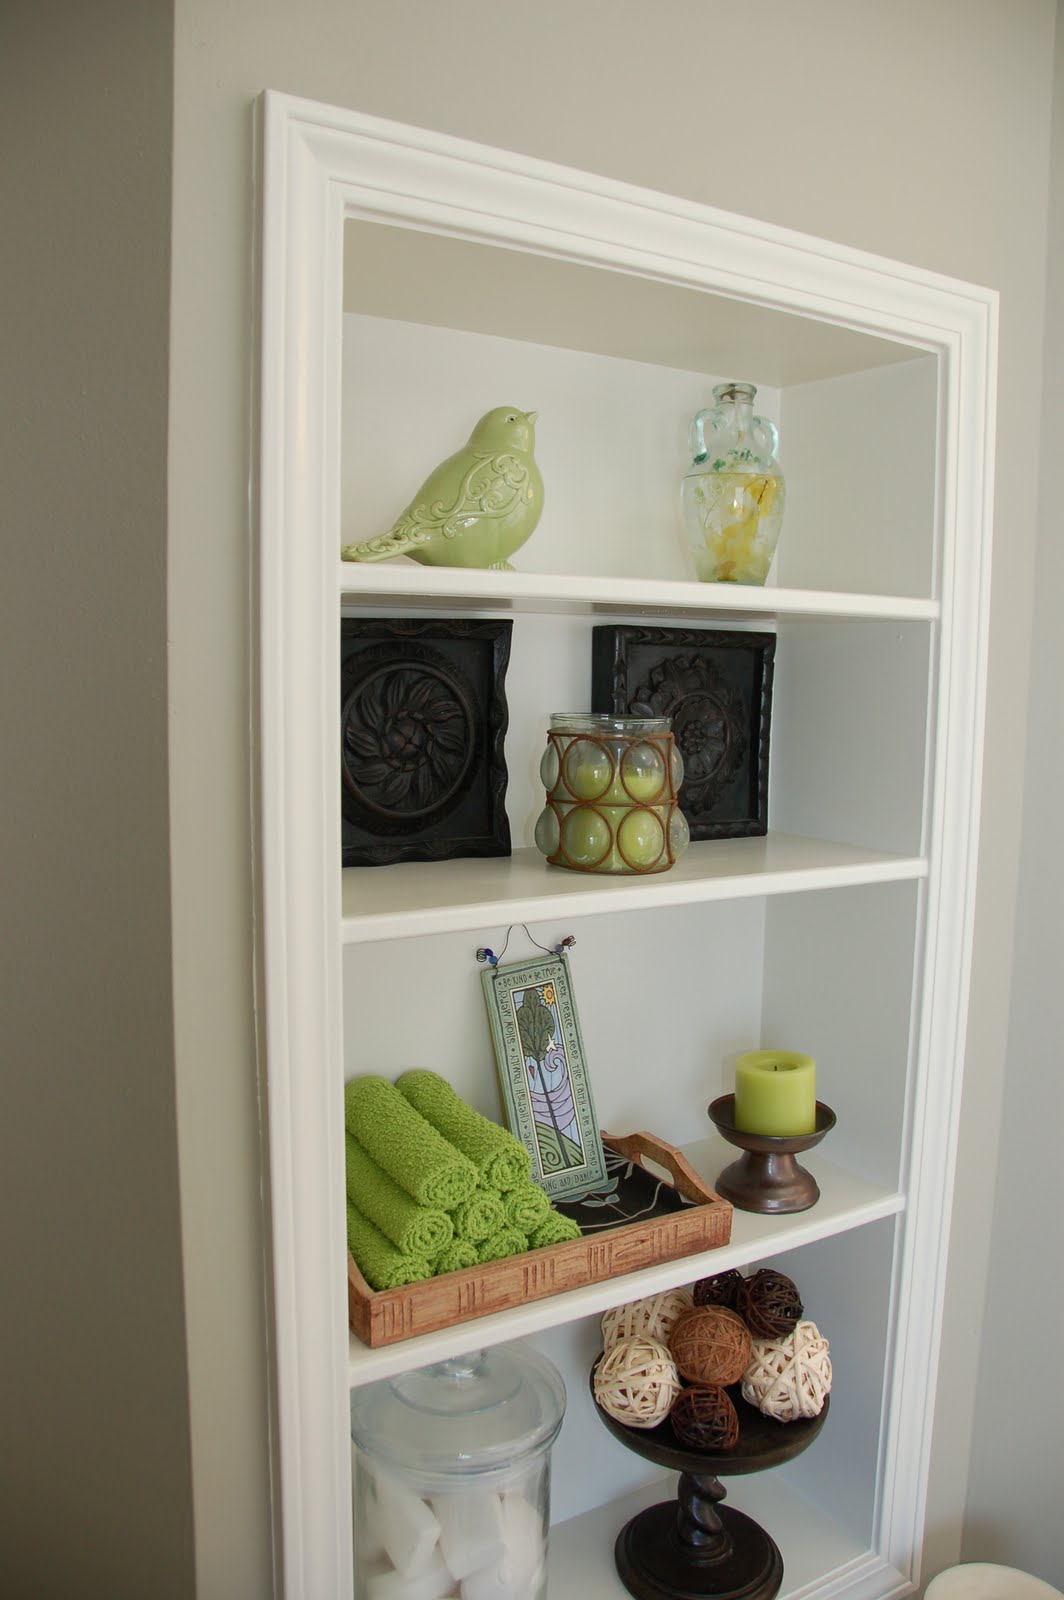
We saw this neat idea on HGTV where you can build a storage cubby between studs in the wall. So there's this wall in our master bathroom and we decided to see what was behind it. Well as it turns out it was just empty space. What a waste! After deciding how large we wanted to make the cubby we cut out a hole in the wall. Then Jason made a "box" out of plywood and created shelves. He installed the box in the hole in the wall (don't ask me how he did this, I just come up with the ideas). Anyway, we painted and trimmed out the cubby with molding. Here's the finished product. I love having the extra space to store things or decorate. Saw the idea of storing soap in the apothecary jar in a magazine. I love how it all turned out!

Friday, September 30, 2011

Photo Boards

I saw this on a blog and loved it so I made a few for myself. I purchased the boards at Michaels. I painted the back and edges of the board either black or brown depending on the color scheme. Next I cut scrapbook paper to fit the area I wanted covered. I used Modge Podge to glue the paper and picture to the surface. File the edges of the paper with a finger nail file until it's even with the edge of the board. Once the Modge Podge was dry I covered the entire surface with Modge Podge using a foam brush. Then decorate with buttons, ribbon, etc. Here are a few of the ones I made.

Craft Projects

My role as Creative Activities director for our local MOPS (Mother of Preschoolers) group challenges me to come up with crafts on a budget for our moms to do. Here are a few of the crafts we've done. I'm always searching blogs and Pinterest for new ideas.

Beaded Silverware
I purchased the serving pieces at the Dollar Store. We used pre-cut floral wire from Michaels and threaded the beads on the front side only. On the back you just twist the wire so it will hold. Needle nosed pliers made the twisting easy. They do have to be hand washed because eventually the wire will rust. Makes for a cute gift when you take a meal to a friend! Washer Necklaces
These were a huge hit at MOPS! The washers were super cheap at Home Depot/Lowes. I used scrapbook paper and traced a circle around the outside edge of the washer and the inside circle. Cut out the circle with scissors. I was able to cut out the inside of the circle by using and exacto knife. Glue the paper to the washer using E6000 industrial glue found at Michaels/Hobby Lobby. Make sure the glue is spread out evenly (use a q tip if necessary). Once the glue has dried take a finger nail file and file the edges of the paper so it's even with the washer. Other blogs suggested using Diamond Glaze on top of the paper and washer but I couldn't find it so I used Modge Podge Dimensional Magic. It works the same way and gives you a hard finish on the surface. It's self leveling to just squeeze a little bit on top of the paper and work it around the surface. If there are any bubbles use a tooth pick to pop them. Let the Modge Podge dry overnight lying flat. We just used black twine for the necklace and a twist clasp. There are so many possibilities with this necklace!
Magnets
Another super easy craft are these magnets. My 5 year old daughter even enjoyed doing this with me. All you need are those clear marble vase fillers that have a flat side and scrapbook paper. Cut the paper to fit the marble and glue using any clear drying glue. I used Tacky Glue. Affix a magnet to the back and you're done! Here's a picture of the clear marble, magnet strip and finished products.
Scripture Memory Cards
If you haven't noticed, I love using scrapbook paper. It's inexpensive and fun! For this craft we cut scrapbook paper to fit the back side of index cards. Glue the paper to the index card using Tacky Glue. Punch a hole through the index card and bind together with a ring holder (not sure if that's the technical name for it). On the index side of the card we wrote scripture verses to memorize. It's small enough you can keep it in your purse of car.